Issue 10 · One essay
Planting the Early Rows
The hand test, 2% drainage grade, pea patches, and thinning as lunch.
In the last article we helped keep our spring fever under control by planning our garden. Since that time, I have been feverishly watching the weather reports, on the nightly news. I am looking for that magical time year when the bitter cold of winter has passed, and the soaking rains of spring are still a few weeks off.
“When it comes right down to it, the success of a garden depends heavily upon getting your crops planted as early as possible.”
Planting the Early Rows
During this time of year, the temperatures warm up, any lingering snow is melted, and the soil is given a chance to dry out from all of winter's moisture. This annual hiatus from precipitation gives us the time to get our garden tilled and planted before the heavy rains of spring arrive. But we must act fast! If we miss this opportunity to till our garden, we may have to wait until the end of April for another chance for the soil to be dry enough to till.
When it comes right down to it, the success of a garden depends heavily upon getting your crops planted as early as possible; beating the spring monsoon season is a must. So, the obvious question is, "When should I start working in my garden?" And the correct answer is, "As soon as the ground is dry enough to till." But how do I know when my soil is dry enough?
The best way to tell if your soil is dry enough is to use the hand test. The hand test is just that, you use your hand, and grab a handful of soil from about one inch below the surface of your garden. If the dirt is moist but still flaky and does not bring back early childhood memories of making mud pies, you should be ok to till. On the other hand, if you let the soil dry out too much, it simply becomes harder to till.
As we have mentioned several times before, adding organic material to your tilth each year is a must. So, if you added either compost or manure before your fall plow, your soil should be in good shape. With that said, it is still a good idea to sprinkle a light coating of standard 16-16-0 fertilizer (16% nitrogen, 16% phosphate, 0% potash) on our soil before you begin tilling. This will help replace any nutrients that may have been washed away by the winter's precipitation.
If you did not perform a fall plow or did not add organic material to your soil. Now is your chance to repent! I cannot stress enough how crucial this step is to the success of your garden. Add a 3" thick layer of compost, or preferably steer manure, before you till.
After thoroughly tilling the soil, use a garden rake to smooth and level the fresh tilth. It is not necessary, nor is it wise, to till your entire garden plot for planting all at once. Only till the areas you intend on planting within the next week. If you wait more than a week to plant in tilled ground, the ground most likely will be crusted over from the sun, and planting becomes difficult. For more information about soil preparation, read my Soil Preparation article.
Water Drainage At this point in the process, it is a good idea to consider water drainage. While all plants in the garden liked to be watered, that does not mean they like to swim. In fact, if irrigated properly, you should only have to water your garden once a week. Over watering can cause plants to rot, bugs to thrive, and makes it messy to work the soil or harvest your crops.
Therefore, as you are smoothing out the tilth, you should induce a 2% gradual slope into your garden to allow for water drainage. As you water your garden, the plants and soil will absorb the desired amounts of water, and the excess will run off of your garden ensuring your crops are not over watered. This also works well for rain, especially heavy or excessive thunderstorms.
Besides adding a little downhill grade to your garden, for proper water drainage, we need to consider how you intend to irrigate. While we will cover this subject in detail in a future article, I would like to spend a few moments on the subject since it affects how we will plant.
With the exception of Mother Nature’s help, irrigation should be performed on a regular schedule. Some people choose to use sprinklers to water their gardens, other use soaker hoses, some still water each plant by hand using a sprinkling can. While all of these methods may work, after a lifetime of gardening experience, I personally have to say the most efficient and successful way to water a garden is furrow irrigation.
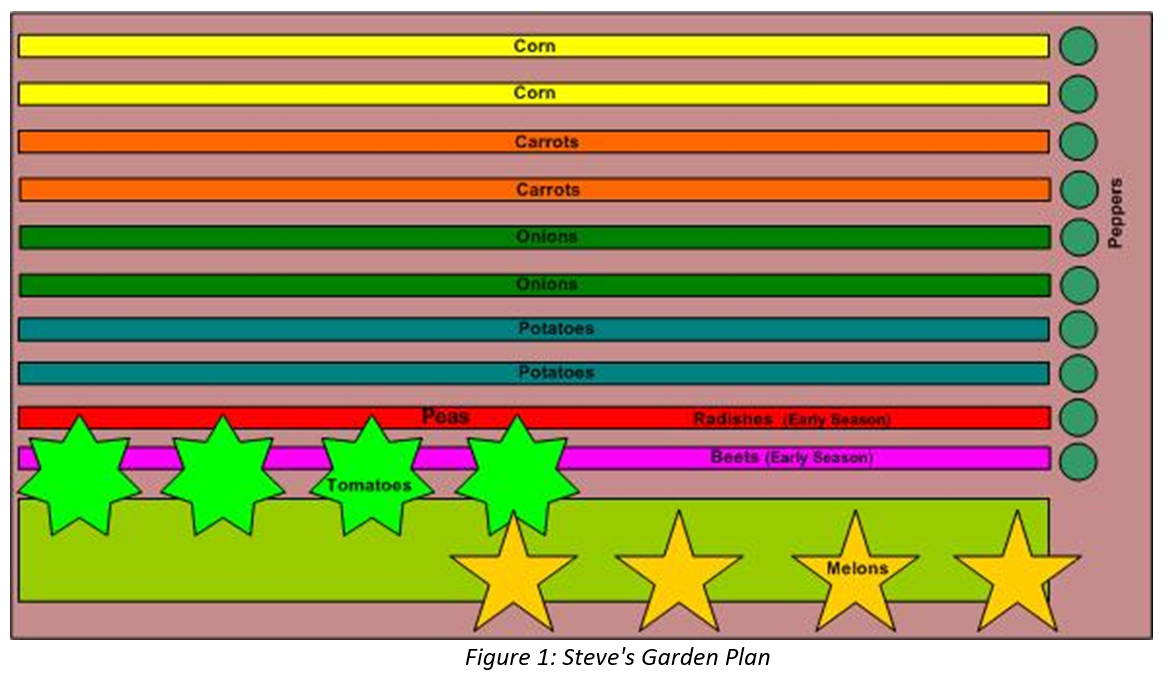
A furrow is a miniature ditch dug in the soil, next to each row of crops, which provides a downhill path for the water to flow due to the 2% slope we engineered into our garden. The downhill end of each row connects to a drainage furrow that runs perpendicular to our row furrows. This drainage furrow allows the excess water from each row to run out of our garden. You can see the layout of the furrows in my garden in the included drawing below.
** Image #1 - my garden rows **
Planting Peas Let us start planting. The first crop I plant each year are peas. Peas are the most frost tolerant crop we grow in our gardens. I usually plant my peas the first week of March each year.
Peas are considered a vine, thus should be planted in a patch and not in rows. As pea vines grow, they entangle around each other for support. Therefore, the seeds should be planted very close to each other in a random placement.
In my garden, I plant a single patch of peas 14" wide and 30' long. Since peas are a legume, I use peas as a rotating crop pared with my corn. The peas will help replenish the soil with the needed nitrogen that the last year’s corn absorbed. For more information about crop rotation see the My Garden Plan article.
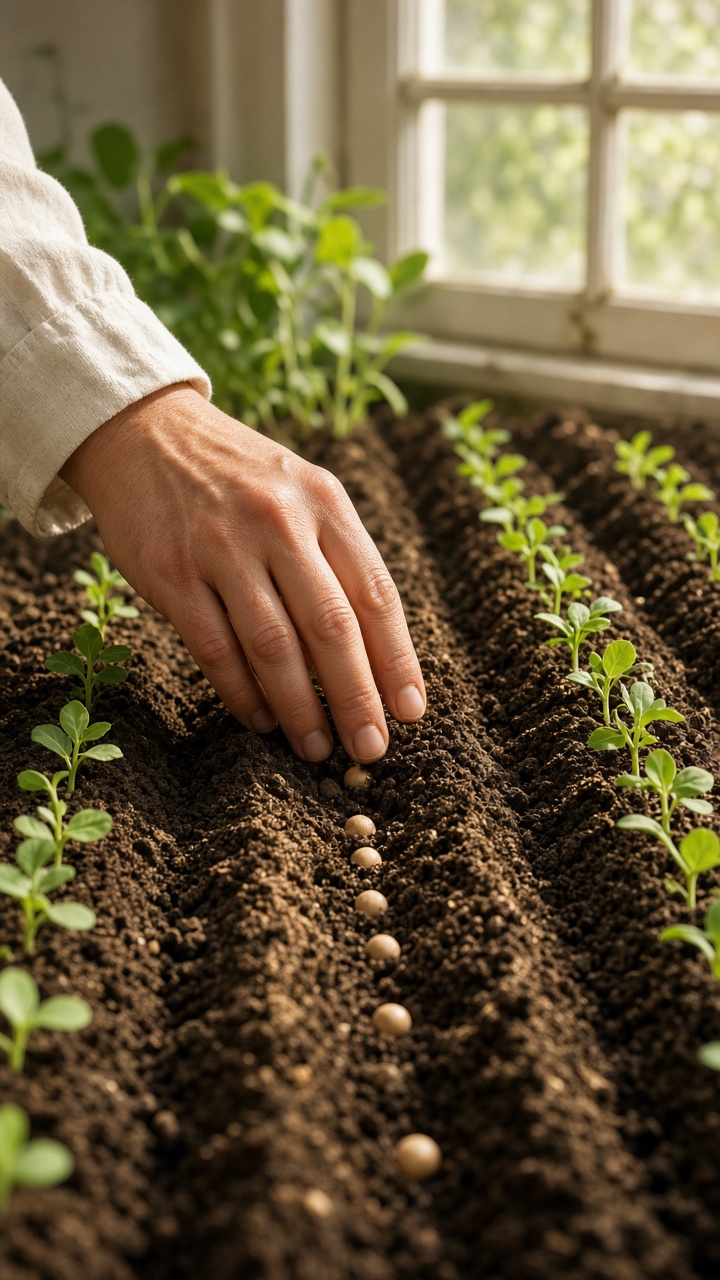
I always plant my peas along one of the long bordering edges of my garden, opposite to my corn. Using two stakes and a string, I mark off a 14" wide row that runs the length of my garden. Next, I use a square mouth shovel to evenly remove about 1 ½" to 2" of soil from my designated row. When I am removing the soil, I am careful to place the removed soil next to the edge of my row so it can easily rake back over the top of my seeds without digging holes in my garden.
Now it is time to plant our seeds. For peas I use two types of seeds. The first 15' of my pea patch I plant with "Little Marvel" pea seeds. This is an excellent brand of pea that matures at a fast rate. The second 15' section I plant with Green Arrow seeds. This brand of pea is equally good but matures at a slower rate. This allows me to have peas fresh from the vine for a much longer period of time, as well as breaking the harvesting and storage of my peas into two separate periods.
When planting my pea seeds into my newly formed row, I use a process I like to call "feed the birds". This method comes from my childhood days growing up on the farm. One of my many chores was to feed scratch (bird seed) to the chickens. I would hold a bucket full of scratch in my left hand, and then with my right hand I would reach into the bucket and grab a hand full of seed. Then with a single whip of my arm I would throw the seed, scattering it across the ground for the scurrying chickens to eat. So with my pea seeds, I scatter the seeds into my row with my hand, just like I was feeding the birds. This is a quick and easy way to plant a lot of seeds in a short period of time. Just be careful to keep the seed in the row.
Now that I have my seeds in the row, all that is left is to gently rake the soil back into the row over the top of the pea seeds. Care must be taken so as not to disturb the seeds. We want to spread an even 1 ½" to 2" of soil over the seeds. While the seeds will still grow if left exposed, the birds will eat them before the day is over; so be sure all of the seeds are completely covered.
The most common question asked of me with regards to planting is, "When should I water my crops?" Unfortunately, there is not an exact answer to this question. The soil still retains a considerable amount of moister from the winter storms. So, the time of your first watering will vary from year to year based off of the amount of winter participation and the temperature and rain fall of early spring.
Although one thing is certain, you do not need to water any early crops immediately after planting. Wait until the ground becomes visible dry or plants begin to wilt before watering. Watering your crops too soon can cause your seeds to rot due to excess water content in the soil.
Congratulations, you now officially have a garden. But to make sure our peas are not a lonely crop, let us plant our other early season crops (radishes, carrots, onions) as well. The rest of the early season crops will all be planted a similar way. So we will speak of them in general terms with regards to their planting.
Planting Other Early Season Crops Now let’s get back to planting. To start my next row of crops I measure from the edge of my peas, and using my stakes and string, I mark off my next row. For all of these crops, I want to space my rows 21" apart. This gives me just enough room for the plants to grow without crowding each other and provides the needed room to easily cultivate my crops.
Now that I have established where my new row is going to be, using the corner edge or the tip of the handle of a garden hoe, I want to make a small 1" wide seed trench about 1 ½" deep. This seed trench should be placed directly beneath my string. With my seed trench in place, I can remove the string and stakes to make it easier to plant my seed.
Next, take one of the seed packages and gently shake the seeds into the bottom of the package. Then tear off the entire top ½" portion of the package so the seeds will be easy to get out of the package. While holding the package of seeds about 3" from the seed trench, begin shaking the seeds from the package into the trench. The seeds should be spread about ¼” apart in a single file line down the length of the seed trench.
After I have put the seeds in to my trench, all that is left is to gently rake about 1" of soil on top of the seeds insuring all my seed are adequately covered.
Moving on to my next row, I repeat the above process for the remainder of my crops, measuring the next row 21" from the center of location of the seeds in my previous row. As with my peas, I want to hold off watering until the ground shows visible signs of dryness or my plants begin to wilt.
Thinning Crops Now with regards to my planting methods, I have heard many people express their opinion that seeds should be planted at least 3" apart. While I understand the reasoning behind this opinion, I take a different point of view. The main reason other gardeners plant seeds 3" apart is to give the adult plants enough room to grow. While plants do need adequate room for growth, first we have to have plants that need the room.
Unfortunately, the germination of seeds is not 100% successful; in fact, it is more like 80%. In my opinion, it is much easier to plant the seeds closer together and then thin out the extra plants after they start to grow. This method has two major benefits. First, we do not need to worry about replanting missing crops. Second, the plants that we thin out, in most cases, can be eaten just like fully developed plants.
For example, the radishes and onions that are thinned are excellent crops to eat. I look forward every year to eating my fresh baby onions with a sandwich for lunch.
But when should I start to thin my crops? There is no magical answer to this question. Just watch, and when your plants start to grow close together, work your way down each row and remove the overcrowded plants so as to leave enough room for the adult plant to grow.
With radishes I thin them as they grow and when I want to eat some. With onions, you can wait to thin them until the tops of the plants are about 8" height.
In the case of peas and carrots, no thinning should be done; the plants will naturally spread themselves out and create the room they need to grow. In the case of carrots, this method produces a much wider row then if we had planted a single seed 3" apart. This wider row, with its tight grouping of carrots, will increase our crop yield and provide added frost protection for our adult carrots all winter long. That's right, I said all winter long. I leave my unused carrots in the ground throughout the winter months, and then I dig a few up as they are needed. They are every bit as fresh as the carrots I dig up in October. We will talk more about this in a future article will cover the harvesting of crops.
Growing Plants It looks like we are almost getting ahead of ourselves. I guess we should let our crops grow before we worry about thinning them. So about how long will it take these seeds to sprout? On average, it takes about 2 weeks before you will see little green shoots pushing their way through the topsoil. This is a good time to become a fan of your local weatherman. Crops are most susceptible to frost during the first few weeks above ground. One cold night is all it takes to cause you to start all over and replant your entire garden.
If your crops have sprouted and are exposed, pay close attention to the daily weather forecasts. If the temperature is going to be remotely close to the freezing point, you need to protect your crops. There are several methods you can use to keep your young crops safe. Some people use tarps and drape them over their plants, but the weight of the tarps tend to crush young plants. Also, if they are not removed in the daytime, they can drastically increase the sun’s heat and cook your plants. For these reasons, I prefer to use a 2" thick layer of compost or peat moss to cover the exposed plants. This is a light material that will not crush the plants, and in turn can easily be brush off with a soft whisk broom. If fact, if left on indefinitely, the plants would simply grow through the compost and it would become part of our gardens soil. Some people use straw as in insulating material for young plants. While straw does makes a very effect frost protective layer, it is also very difficult to clean up. That is why I choose to use compost to protect my plants.
If you followed my recommended soil preparation steps, there will be plenty of nutrients and organic material in your soil for you seeds to germinate and grow into health plants. We do not even need to think about adding any kind of fertilizer until after we have watered our garden at least twice. I will dedicate and entire future article to fertilizers and fertilizing techniques.
The Planter The final item I want to talk about is an ingenious little invention known as a planter. This wonderful gardening tool was designed for medium to large sized home gardens. It will cut your planting time in half and help to insure straight and evenly spaced rows.
A planter is a relatively simple and small two wheeled device that is manually pushed down the rows of your garden. As you push the planter down the rows, a small plow digs a shallow seed trench into which it automatically places the seeds. It comes complete with an adjustable side arm that marks off the location of your next row, making it a breeze to line up and space out the rows of your garden.
The planter has a hopper into which you place a large quantity of seeds. The seeds are gravity feed into a dispensing unit containing a 6" interchangeable circular disk. Spaced evenly along the outer edges of this disk are opening through which the seeds can pass. As you push the planter down the rows of your garden, the wheels rotate which in turn rotates this disc. When an opening in the disc reaches the bottom of the dispensing unit, a seed falls from the hopper and down a channel where it is placed into the seed trench.
The planter comes with several different seed discs for planting different kinds of plants. These different discs can be used to control how close together you want your seeds planted.
If you have a garden of any size, I highly recommend purchasing a planter. They are well worth the expense and will make planting your garden quick and easy.
In conclusion, remember once our early crops are planted, it takes about two weeks for the pants to sprout. After this point, pay close attention to the daily weather reports and cover your plants if it looks like it may freeze. Until next time, keep those thumbs green.
Planting windows (temperate home plot)
Staggered crops spread harvest labor across the season.