Issue 09 · One essay
How To Grow Your Own Starts
Windowsills, bleach-washed cups, drainage rock, and lights that actually grow plants.
Since purchasing starts can quickly break your gardening budget, growing your own starts is a great way to save money. This way, you can still enjoy all of the benefits of starts but at the much cheaper price of seeds. So how do we grow starts?
“We would not want your cat to confuse your plants for its litter box.”
How To Grow Your Own Starts
First, you will need to find a place to grow your starts. Since the ideal temperature for seeds to germinate is between 65 and 80 degrees Fahrenheit, unless you have a heated garage, this will most likely be somewhere in your house. In the search for the perfect place for your young plants to grow, consider any pets and young children you may have. We would not want your cat to confuse your plants for its litter box, or your children to think you have made them an indoor sandbox.
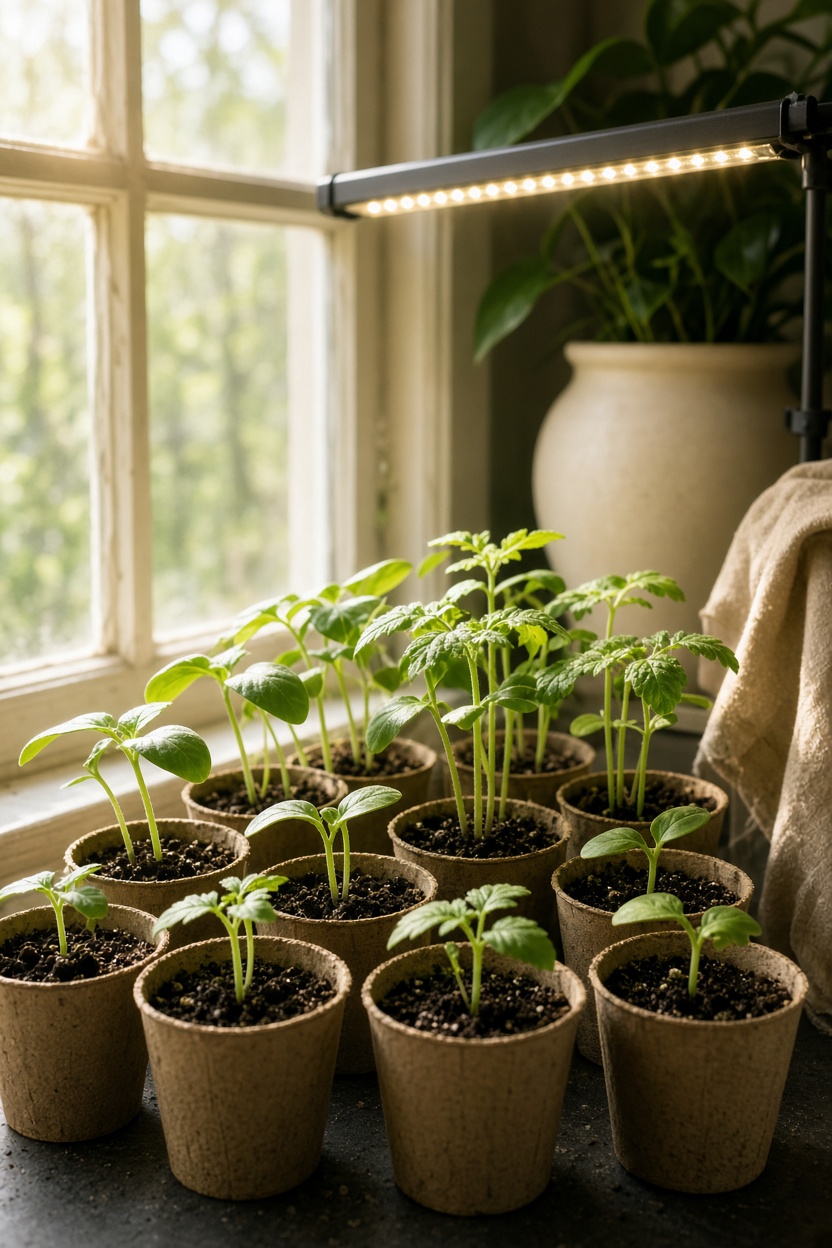
Next is the issue of light. While plant nursery growers will say it takes 16 hours of direct light to grow plants properly, the reality is you can use a large window in your home that receives a good amount of sun light. If you are going to use artificial light on your plants, make sure to use "grow" light bulbs or lamps. Regular light bulbs do not provide enough of the light spectrum to grow plants well. Artificial lights should be placed 3 to 6 inches away from the planted seeds and raised as the plants grow. The lights will add additional heat to your soil and help the seeds germinate.
Now that you have picked out a growing spot, what are you going to plant your seeds in? For the most part, almost anything can be used to grow plants in: wicker baskets, old yogurt cups, egg cartons, last year's plastic seed flats, I have even seen someone grow a plant in an old boot. Anything that will hold soil should work. For growing starts, smaller containers work best. We can always transplant them in to larger containers if the plants grow too big before we plant them outside.
Now before you start reaching for your son's old sneakers, whatever containers you are going be use, need to be disinfected. Regardless if your containers are new or old, each container should be washed in a solution of bleach water, consisting of a 10 to 1 water to bleach ratio; then thoroughly rinse each container with clean water and allow to air dry.
Next, make sure each container has drainage holes on its bottom side. While the soil seeds grow in needs to be kept moist, like you and I, plant roots breathe. If there is too much water content in the soil, the plant roots will not be able breath and the plant will literally drown. The clay in the soil retains water for the plant, and these drainage holes keep the soil from becoming supersaturated with water, by allowing excess water to drain out of the soil. If your container does not have drainage holes, use a nail, small knife, or a drill bit to create them. Since these holes are going to allow water to leak out of your plants each time you water, it is a good idea to put a saucer or lid under each container.
Next, fill the bottom 1/2" potion of the container with small pebbles or rocks. The rocks will filter the water before it leaks through the drainage holes, prevent the soil in your containers from running out with the water.
Now, take a gallon sized bucket or large bowl and fill it 3/4 of the way full of top soil or potting soil. For growing starts, I prefer to use "Miracle Grow" potting soil; it may cost a little more, but the results will speak for themselves. Next, soak the potting soil in the bucket with warm water. Use your hand or a gardening trowel to mix the soil around. Make sure that all of the soil is completely saturated with water. Next, drain the excess water and fill each container with the wet soil.
Using your finger or a pencil, make a small hole in the center of the soil, two or three times the depth of the seed. Next place several seeds into the hole and cover the seeds up with soil. Now cover the top of the containers with plastic wrap. The plastic wrap helps to keep the soil temperature and moister content higher and prevents the soil from drying out as fast. Check the containers daily to see if the soil is drying out. If it is, mist the soil with warm water from a spray bottle; it is not recommended to pour water directly into the containers as it can disturb or damage the germinating seeds.
Be sure to read the instructions on each of your seed packages. Some seeds require complete darkness in order to germinate. For these types of seeds, simply place a small piece of cardboard on top of the container to prevent the light from entering.
As you are waiting for your seeds to grow, keep in mind that seeds germinate at different rates. You can find the specific germination rate for each seed on the seed package. The average germination rate for most seeds is about two weeks.
Once your seeds begin to sprout, remove the plastic wrap from the containers. Now that your seeds have sprouted, we can start to give them a little bit of fertilizer. At this tender young age, you should still be using a mister to water your plants; so the easiest way to feed your plants is to add a commercial plant fertilizer, like "Miracle Grow Plant Food", mixed at half strength, to the water before misting.
As your plants continue to grow, you will start to notice that a couple of the seeds in a single container are growing better then the others. This is another example of the survival of the fittest. Using a small pair of scissors, cut off the weaker plants at the base of the soil. This will ensure the healthier plant will get all of the nutrients and have enough room to grow.
If your plants have been growing inside for a longer period of time, depending upon the size of the pots, your plants may become "Root Bound". A root bound plant occurs when the plant has outgrown its container. If left uncorrected, your plant will begin to die.
To fix a root bound plant, select a new container that is at least 3 times the size of its current container. Perform the exact steps to prepare the new container for the plant as you did to prepare the other containers for seeds, with one exception, only fill the new container 1/2 full of wet soil.
Using your hand or gardening trowel, dig a hole in the center of soil the size of the old container. Next, remove the plant and all of the soil from the old container. Since the soil has not been worked since it was placed in the container, and since the plant
s roots have grown throughout the soil, the soil should cling together in to one mass. If the container is thin enough, you can gently squeeze the sides of the container with your fingers to help free the plant and soil from its container. Then while holding the container upside down on about a 45-degree angle with one hand, gently cradling the top of the plant in your other hand; now gently shake the plant out into your hand.
Before we place your freed plant into its new home, we want to loosen up its root just a bit. Ever so gently, massage the roots and soil with your hand. This will separate the roots from each other allowing them to expand out in their new container.
Next, put the plant and soil into the new container. Try to keep the topsoil line of the plant at the same height. In order to do this, you may have to rake a bit of soil back underneath the plant. Lastly, fill the remainder of the new pot with wet soil, gently tamping the soil around the plant to secure its position.
While growing starts is usually a simple process, there are a couple of common problems that can creep up. The first problem is insects like: aphids, mites, and fruit flies. These pests can be easily handled by using a household plant insecticide. Just be sure to eliminate them before you have a full blow invasion on your hands. The warm most soil of your plants is the perfect breeding ground for insects.
Another issue that often occurs is the growth of the
. Dampening disease is a fungus that grows on the warm, moist surface of the soil; it looks a lot like small little cotton balls. This fungus will eat the seeds and young seedlings before they get a chance to grow. The best way to avoid this fungus is to not get it in the first place. If you begin to notice dampening disease growth on your soil, reduce your watering slightly, and increase air circulation with a small gentle fan.
As the weather warms up outside and you are getting ready to move your plants outside, you need to "Harden" your plants. Harding is the process of slowly introducing your plants to the changing temperature and weather of the outside world. If we do not allow our plants to slowly acclimate to the conditions outdoors, the sudden change in environment can actually stress the plants so much they can die.
To properly harden plants, start by placing them outdoors for two to three hours during the middle of the day. It works best when you place your plants close to the actual area where you intent to plant them. Over the course of a week, gradually increase the time they spend outdoors until you are leaving them out from sunup to sun down.
As soon as frost is not an issue, you can transplant your plants into your garden. Start by digging a hole in your garden the size of the container the plant is in. Then follow the aforementioned steps for transplanting a root bound plant. Be sure to massage and loosen the roots of the plant before sticking the plant into the hole. After tamping soil around the plant, it is a good idea to spot water the plant with 1/2 to1 gallon of water depending upon the plants size.
Plants sometimes have a tendency to wilt after transplantation; keep an eye on the plants for the next few days and make sure they have enough water. They should perk up in a day or two and begin to flourish in their new home. Begin to water and fertilize them on a regular basis along with the rest of your garden.
The last thing to watch out for is frost. Be ready to cover you plants with grading caps or "Wall of Waters" if the temperature is even flirting with the freezing point. With frost, it is always better to be safe then sorry. You can always take the caps off in the morning if it does not freeze, but you can bring a plant back to life after frost kills it.
So, let us get going, spring is almost here. We know how to prepare the soil, we have our garden plan, and we know all about seeds. So, go get your seeds and get growing those starts. Until next time, keep those thumbs green.
<?xml version="1.0" encoding="UTF-8" standalone="yes"?>
<a:clrMap xmlns:a="http://schemas.openxmlformats.org/drawingml/2006/main" bg1="lt1" tx1="dk1" bg2="lt2" tx2="dk2" accent1="accent1" accent2="accent2" accent3="accent3" accent4="accent4" accent5="accent5" accent6="accent6" hlink="hlink" folHlink="folHlink"/>